


See how LogRocket's AI-powered error tracking works
no signup required
One of the most important aspects of a mobile app is to have different screens and be able to move between them, with each screen serving a different purpose for the user.
In this article, we’ll look at how to enable navigation in your React Native apps. We’ll also learn about the most commonly used methods of navigation with React Native — Stack Navigator, Bottom Tab Navigator, and Drawer Navigator — by building an e-commerce application.
React Native navigation libraries
React Native by itself does not come with any navigation support for your app. You will need to integrate a third-party library to enable navigation. The three most common libraries are:
- React Navigation: most navigation is performed within the JavaScript layer, with the ability to use native APIs if necessary
- React Native Navigation: this uses platform-level APIs to perform navigation
- React Native Router Flux: this library uses React Navigation internally but exposes a different set of APIs to enable navigation
For this tutorial, we’ll create a seamless navigation experience using the React Navigation v6 library.
Installing React Navigation
The installation is pretty simple, but React Navigation has a few peer dependencies that need to be installed:
yarn add @react-navigation/native
yarn add @react-navigation/native-stack
yarn add react-native-screens
yarn add react-native-safe-area-context
To install native dependencies for iOS, run:
pod install --project-directory=ios
Installing React Navigation on Android
To finish the library installation on Android, there’s an extra step we must complete. Open up the MainActivity file and add the following code snippet:
@Override
protected void onCreate(Bundle savedInstanceState) {
  // Make sure your import android.os.Bundle
  super.onCreate(null);
}
At this point, your project is ready to use the first type of navigation we’ll cover, stack navigation.
Implementing stack navigation in React Native
Stack navigation is the most basic type of navigation that every app has. It is used to depict a logical flow that provides the user with the sense of performing specific steps to reach a destination.
For example, in an e-commerce app, a common navigation stack is similar to this:
Search for an item to buy → Item detail → Review cart → Pay → Order placed
Let’s see how we can create just the Search → Item Detail stack. The other screens will just be a replication of the same process.
In React Navigation, all your screens need to be wrapped around the NavigationContainer component, as follows:
import {NavigationContainer} from '@react-navigation/native';
import React from 'react';
import {SafeAreaView} from 'react-native';


export const MyApp = () => {
  return (
    <SafeAreaView>
      <NavigationContainer>
        {/* Rest of my components wrapped inside a NavigationContainer */}
      </NavigationContainer>
    </SafeAreaView>
  );
};

const styles = StyleSheet.create({
  fullScreen: {flex: 1, alignItems: 'center', justifyContent: 'center'},
});
To create a stack of screens that users can navigate from one to the other, there are three aspects to keep in mind:
createNativeStackNavigator: creates a stackNavigator: encapsulates all the screens in the stack created above (this will be much clearer when you look at the code below)Screen: every single screen that can be placed inside theNavigator
Let’s look at expanding the above code snippet. The first step is to create the Stack Navigator with two screens, Search and ItemDetail. You may want to pass on some data when you navigate from one screen to the other, which is why I’ve defined the OrderPlacementStackParams. This is completely optional.
OrderPlacementStack has two properties: Navigator and Screen.
type OrderPlacementStackParams = {
  Search: undefined;
  ItemDetail: {itemId: string};
};

// create the stack navigator below
const OrderPlacementStack = createNativeStackNavigator<OrderPlacementStackParams>();

// If you are not using typescript or do not want to add the types you can do the following
// const OrderPlacementStack = createNativeStackNavigator();
Inside the NavigationContainer component, let’s create the actual navigator and the screens within it.
// Add the boilerplate code to create the stack components

export const MyApp = () => {
  return (
    <SafeAreaView style={{flex:1, backgroundColor:'white'}}>
      <NavigationContainer>
        <OrderPlacementStack.Navigator initialRouteName={'Search'}>
          {/* Your screens go here which will be added in the next step */}
        </OrderPlacementStack.Navigator>
      </NavigationContainer>
    </SafeAreaView>
  );
};
Now that we have the boilerplate ready, let’s begin with the search screen. Every screen within the navigator will be given two props:
navigationroute
We’ll create the types for them:
type SearchNavigationProp = NativeStackNavigationProp<
  OrderPlacementStackParams,
  'Search'
>;

type SearchRouteProp = RouteProp<OrderPlacementStackParams, 'Search'>;

interface ISearchScreenProps {
  navigation: SearchNavigationProp;
  route: SearchRouteProp;
}

const SearchScreen = ({navigation, route}: ISearchScreenProps) => {
  return (
    <SafeAreaView style={styles.fullScreen}>
      <TouchableOpacity>
        <Text>Go to Item Detail Screen</Text>
      </TouchableOpacity>
    </SafeAreaView>
  );
};
Don’t worry too much about TouchableOpacity not doing anything right now. We’ll integrate it to ensure you can go to the ItemDetail screen from there.
Now that you have the SearchScreen component, let’s add it to our stack.
<NavigationContainer>
    <OrderPlacementStack.Navigator initialRouteName={'Search'}>
      <OrderPlacementStack.Screen name="Search" component={SearchScreen} />
    </OrderPlacementStack.Navigator>
</NavigationContainer>
In the above code snippet, we wrapped our Screen inside the Navigator property. Make sure the name prop of the Screen is the same as the key defined in the OrderPlacementStackParams type that we defined earlier.
With this, you have your entire setup to create stack navigation complete. Now all you have to do is replicate the same steps for the other screens.

Navigating between screens in a stack
Next, let’s try adding the ItemDetail screen to see how we can navigate from the SearchScreen to the ItemDetail screen.
type ItemDetailNavigationProp = NativeStackNavigationProp<
  OrderPlacementStackParams,
  'ItemDetail'
>;

type ItemDetailRouteProp = RouteProp<OrderPlacementStackParams, 'ItemDetail'>;

interface IItemDetailScreenProps {
  navigation: ItemDetailNavigationProp;
  route: ItemDetailRouteProp;
}

const ItemDetailScreen = ({navigation, route}: IItemDetailScreenProps) => {
  return (
    <SafeAreaView style={styles.fullScreen}>
      <TouchableOpacity>
        <Text>
          `This is the Item Detail Screen with Item Id: ${route.params.itemId}`
        </Text>
      </TouchableOpacity>
    </SafeAreaView>
  );
};
Ignore the route.params.itemId on Line 18 for now. I’ll explain it later. Add this screen to the OrderPlacementStack.Navigator.
<NavigationContainer>
  <OrderPlacementStack.Navigator initialRouteName={'Search'}>
    <OrderPlacementStack.Screen name="Search" component={SearchScreen} />
    {/*  Add the item detail screen as shown below */}
    <OrderPlacementStack.Screen
      name="ItemDetail"
      component={ItemDetailScreen}
    />
    {/*  Add the item detail screen as shown above */}
  </OrderPlacementStack.Navigator>
</NavigationContainer>
We need a way to go to this screen when I tap the Go to Item Detail Screen button in the Search screen. To navigate between screens, we’ll use the navigation prop. You have two APIs exposed in the navigation object that can help you go to a different screen. They are:
push: pushes a new instance of the screen even if it already exists in the current stacknavigate: if the component with its name exists in the current stack, then it goes to that screen. If not, it creates a new instance of the screen and pushes it onto the stack
Use these APIs however it makes sense for your application. We’re going to use the navigate API, although both of them have the same signature.
Passing properties while navigating between screens in React Native
Notice in OrderPlacementStackParams that the ItemDetail screen needs an itemId, which makes sense because you need some identifier if you want to display details of a particular item.
Now we’ll integrate the TouchableOpacity action with the Search screen. Replace the TouchableOpacity with the following code:
<TouchableOpacity
  onPress={() => {
    // Here you're asking the navigation stack to push the screen with
    // `ItemDetail` as its identifier
    // with data: {itemId: '1'}
    navigation.navigate('ItemDetail', {itemId: '1'});
  }}>
    <Text>Go to Item Detail Screen</Text>
</TouchableOpacity>
This data of {itemId: 1} that is passed can now be accessed in the ItemDetail screen using in the route prop.
The route prop has the params object that is going to contain this object. Therefore, you can access the itemId property using route.params.itemId.
Configuring the header
By default, React Navigation sets a default header for both iOS and
Android, but in most cases, you will want to customize it. You can do so
by using the setOptions method on the navigation prop.
In the setOptions
method, you return an object with certain properties that will help you
customize either the entire header or certain parts of the header.
More great articles from LogRocket:
- Don't miss a moment with The Replay, a curated newsletter from LogRocket
- Learn how LogRocket's Galileo cuts through the noise to proactively resolve issues in your app
- Use React's useEffect to optimize your application's performance
- Switch between multiple versions of Node
- Discover how to use the React children prop with TypeScript
- Explore creating a custom mouse cursor with CSS
- Advisory boards aren’t just for executives. Join LogRocket’s Content Advisory Board. You’ll help inform the type of content we create and get access to exclusive meetups, social accreditation, and swag.
We’ll look at customizing the entire header for now. You can do so with the useEffect Hook by calling the setOptions method and overriding the header key:
useEffect(() => {
    navigation.setOptions({
      // You can get the reference to navigation and route props here as well if you need it.
      header: ({navigation, route}) => (
        <View
          style={{height: 56, justifyContent: 'center', alignItems: 'center'}}>
          <Text>Custom Header on Search Screen</Text>
        </View>
      ),
    });
}, []);
There are other keys you can use to customize your header as well. A few common ones are:
title: returns a string you want as the title of the screenheaderLeft: returns a component that will be rendered as the left button on the headerheaderRight: returns a component that will be rendered as the left button on the headerheaderStyle: provides a style to the entire header component
If you want to change the default settings of the header, you can set the common options of the header in the Navigator object itself using the screenOptions prop.
For example, if you want the default background color of the header bar to be orange you can do this:
Calling the
navigation.setOptionsAPI is going to override all these default options. Note that here, we are not talking about thenavigationprop, we are talking about theNavigatorobject.
<NavigationContainer>
  <OrderPlacementStack.Navigator
    initialRouteName={'Search'}
     screenOptions={() => ({
        headerStyle: {backgroundColor: 'orange'},
      })}>
    <OrderPlacementStack.Screen name="Search" component={SearchScreen} />
    {/*  Add the item detail screen as shown below */}
    <OrderPlacementStack.Screen
      name="ItemDetail"
      component={ItemDetailScreen}
    />
    {/*  Add the item detail screen as shown above */}
  </OrderPlacementStack.Navigator>
</NavigationContainer>
Navigating back with React Navigation
To return to the previous screen, use the goBack method on the navigation prop.
navigation.goBack();
Modal navigation
Modal presentations generally indicate a start of a new flow within your current flow or are used when you want the user to take some action before moving on to the next step.
The animation for these screens is generally different on both iOS and Android from your regular stack navigation animation, which enables users to feel like they are performing a step and progressing into the flow. Modal animations tell users that a new flow is starting.
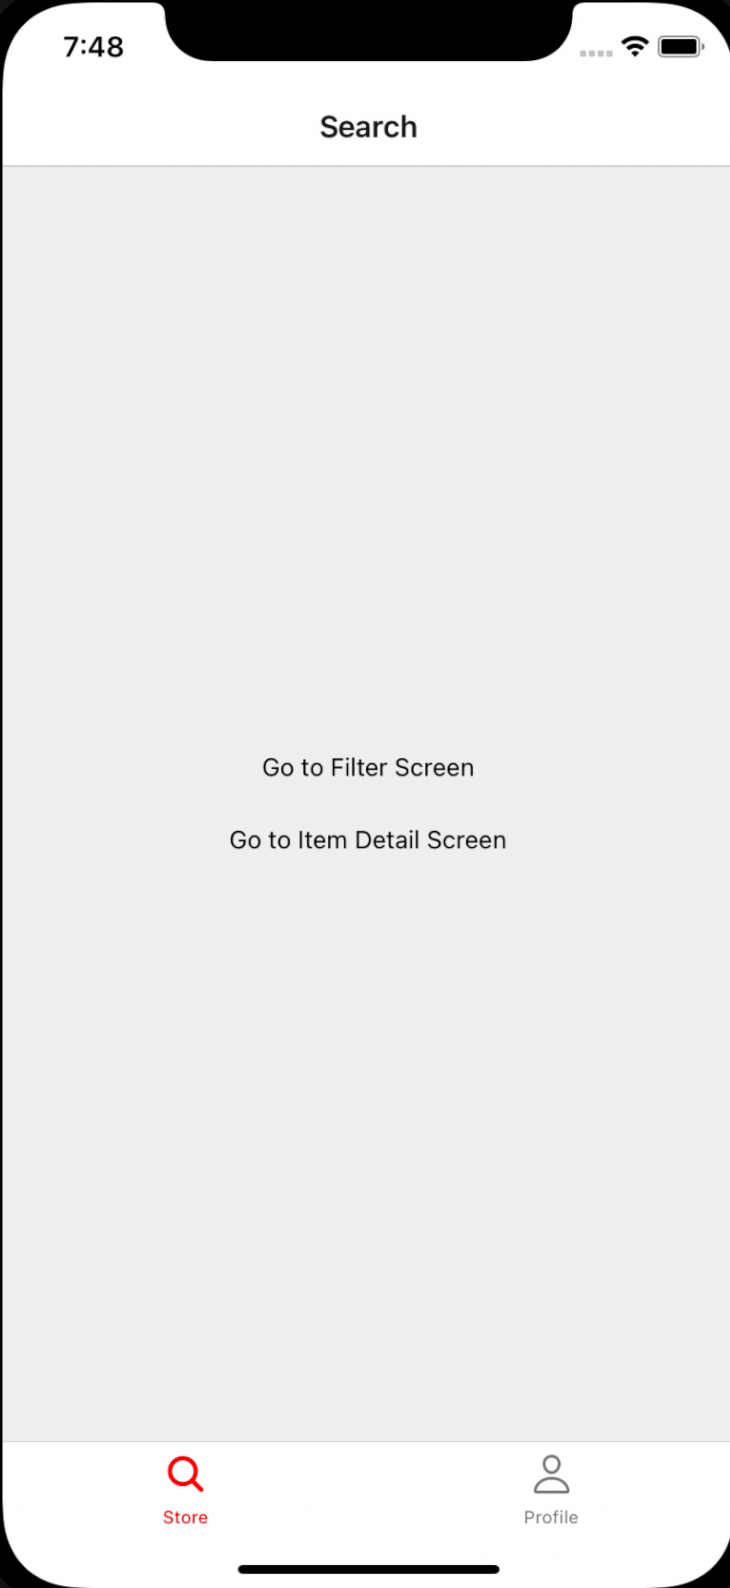
Let’s add a new screen to our OrderPlacementStack, which we’ll be presenting modally.
type OrderPlacementStackParams = {
  Search: undefined;
  ItemDetail: {itemId: string};
  Filter: undefined; // added a new screen called Filter
};

type FilterNavigationProp = NativeStackNavigationProp<
  OrderPlacementStackParams,
  'Filter'
>;
type FilterRouteProp = RouteProp<OrderPlacementStackParams, 'Filter'>;
interface IFilterScreenProps {
  navigation: FilterNavigationProp;
  route: FilterRouteProp;
}
const FilterScreen = ({navigation, route}: IFilterScreenProps) => {
  return (
    <SafeAreaView style={styles.fullScreen}>
      <Text>{`Filter Screen`}</Text>
    </SafeAreaView>
  );
};
Update the OrderPlacementStack by adding this new screen.
<OrderPlacementStack.Navigator
      initialRouteName={'Search'}
      screenOptions={() => ({
        headerStyle: {backgroundColor: 'white'},
      })}>
      <OrderPlacementStack.Screen name="Search" component={SearchScreen} />
      <OrderPlacementStack.Screen
        name="ItemDetail"
        component={ItemDetailScreen}
      />
      {/* Added the new FilterScreen here */}
      <OrderPlacementStack.Screen
        name="Filter"
        component={FilterScreen}
        options={{presentation: 'modal'}}
      />
</OrderPlacementStack.Navigator>
You can present any screen modally by updating the options for the screen by putting in the presentation as modal.
Call the following method, and the Filter screen should be presented modally:
navigation.navigate('Filter');
Now let’s add a button on the Search screen.
<TouchableOpacity
        onPress={() => {
          // Here you're asking the navigation stack to push the screen with
          // `ItemDetail` as its identifier
          // with data: {itemId: '1'}
          navigation.push('Filter');
        }}>
        <Text>Go to Filter Screen</Text>
</TouchableOpacity>
This completes all the basics of navigation screens in stack navigation. Let’s look at the bottom tab navigation.
Creating bottom tab navigation in React Native
This section is going to be very similar to the stack navigation section as it employs very similar APIs.
Let’s re-style the app in such a way that there are two bottom tabs with the first tab as the “Store,” where you can buy things, and the second tab as the “Profile” section.
Let’s first extract the entire Item Search and Detail stack into its component and call it the OrderPlacementStackComponent. Now create a new ProfileStackComponent.
const OrderPlacementStackComponent = () => {
  return (
    <OrderPlacementStack.Navigator
      initialRouteName={'Search'}
      screenOptions={() => ({
        header: () => {
          return <View style={{height: 56, backgroundColor: 'red'}} />;
        },
      })}>
      <OrderPlacementStack.Screen name="Search" component={SearchScreen} />
      <OrderPlacementStack.Screen
        name="ItemDetail"
        component={ItemDetailScreen}
      />
    </OrderPlacementStack.Navigator>
  );
};

const ProfileStack = createNativeStackNavigator(); // Defined it without the types here for brevity

const SettingsScreen = ({navigation}) => {
  return (
    <View style={{flex: 1, justifyContent: 'center', alignItems: 'center'}}>
      <TouchableOpacity onPress={() => navigation.navigate('Login')}>
        <Text>Go to Login Screen</Text>
      </TouchableOpacity>
    </View>
  );
};
const LoginScreen = ({navigation}) => {
  return (
    <View style={{flex: 1, justifyContent: 'center', alignItems: 'center'}}>
      <Text>Login screen</Text>
    </View>
  );
};
const ProfileStackComponent = () => {
  return (
    <ProfileStack.Navigator initialRouteName={'Settings'}>
      <ProfileStack.Screen name="Settings" component={SettingsScreen} />
      <ProfileStack.Screen name="Login" component={LoginScreen} />
    </ProfileStack.Navigator>
  );
}
Installation and usage
Before you can use bottom tab navigation, you must install the following dependency:
yarn add @react-navigation/bottom-tabs
Similar to how we created a Stack Navigator, we have to create a Tab Navigator.
type BottomTabParams = {
  Store: undefined;
  Profile: undefined;
};

const AppBottomTab = createBottomTabNavigator<BottomTabParams>();
Let’s replace the components inside the NavigationContainer with the Tab Navigator. It has a similar structure to the Stack Navigator, where you have two properties, namely Navigator and Screen, which are used to constitute the entire tab structure.
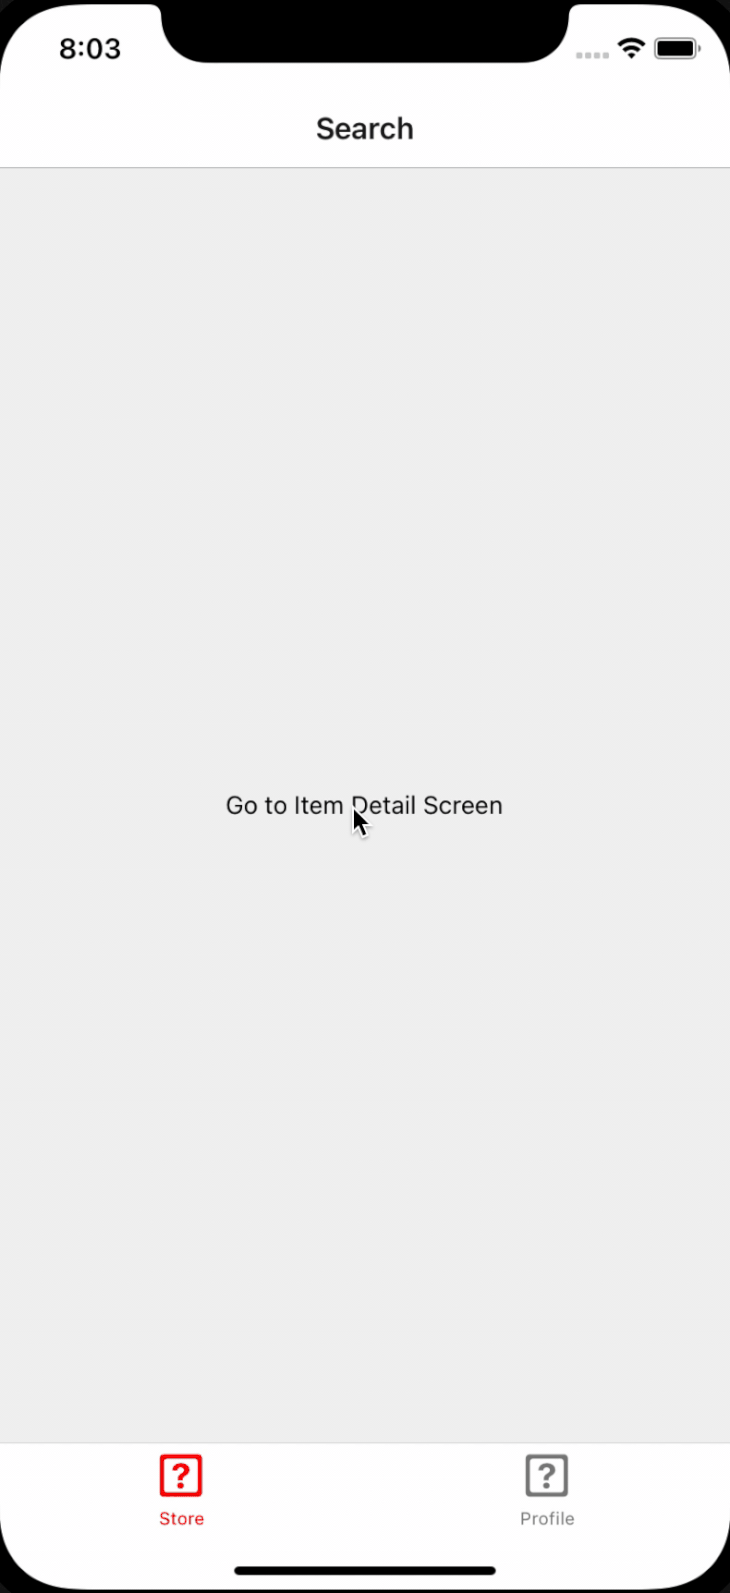
<NavigationContainer>
  <AppBottomTab.Navigator
    screenOptions={() => ({
      headerShown: false,
    })}>
    <AppBottomTab.Screen
      name="Store"
      component={OrderPlacementStackComponent}
    />
    <AppBottomTab.Screen
      name="Profile"
      component={ProfileStackComponent}
    />
    </AppBottomTab.Navigator>
</NavigationContainer>
Run the app. You’ll see a bottom tab bar rendered with two tabs, “Store” and “Profile.”
Configuring the tab bar
Generally, you’d want to customize for the bottom tab bar:
- The tab icons
- The tab icon state when it’s the active tab, versus when it is the inactive tab
- Badge icons on the tab
We’ll use screenOptions as we did on the Stack Navigator. You can use the tabBarIcon key to return a custom tab bar component.
<NavigationContainer>
    <AppBottomTab.Navigator
      screenOptions={({route}) => ({
        headerShown: false,
        tabBarActiveTintColor: 'red',
        tabBarInactiveTintColor: 'gray',
        tabBarIcon: ({focused, size, color}) => {
          return focused ? (
            <CustomFocusedTabbarIcon size={size} color={color} />
          ) : (
            <CustomUnfocusedTabbarIcon size={size} color={color} />
          );
        },
      })}>
      <AppBottomTab.Screen
        name="StoreTab"
        component={OrderPlacementStackComponent}
      />
      {/* ProfileStack component may be another component */}
      <AppBottomTab.Screen
        name="ProfileTab"
        component={ProfileStackComponent}
      />
    </AppBottomTab.Navigator>
</NavigationContainer>
The tabBarIcon property gives three properties as inputs to the function that needs to return your custom tab bar icon components:
focused: whether this tab is the current active tab or notsize: the available size for your custom component to rendercolor: the color that you need to render that component with. This can be overridden by using thetabBarActiveTintColorand thetabBarInactiveTintColor, and, depending on whether the tab isfocusedor not, the value ofcoloris either going to be the active tint color or the inactive tint color.
Navigating between tabs
Navigation between tabs is performed by using the navigate API on the navigation object:
navigation.navigate('ProfileTab') // navigate to the ProfileStackComponent
Drawer navigation in React Native
Now let’s look at the last common navigation pattern: drawer navigation. Drawer navigation is used to give the user an easy access point to all the flows in your app from a drawer in case your app has a lot of flows (i.e., screens).
Installing drawer navigation
yarn add @react-navigation/drawer
yarn add react-native-gesture-handler
yarn add react-native-reanimated
pod install --project-directory=ios
Ensure you put the following line in your index.js:
import 'react-native-gesture-handler';
Usage of drawer navigation
Generally speaking, apps do not use both the bottom tab navigation and drawer navigation within the same app, so let’s start fresh.
Similar to earlier sections, you first need to create your DrawerStack using the createDrawerNavigation API.
type DrawerAppStackParams = {
  Search: undefined;
  MyOrders: undefined;
};
// Create the Drawer Stack Navigator
const DrawerStack = createDrawerNavigator<DrawerAppStackParams>();
Next, create the entire stack using the same Navigator and Screen properties that the DrawerStack object provides us with.
Do not forget to wrap the entire stack inside the NavigationContainer object.
export const App = () => {
  return (
    <SafeAreaView style={{flex: 1, backgroundColor: 'white'}}>
      <NavigationContainer>
        <DrawerStack.Navigator
          initialRouteName={'Search'}>
          <DrawerStack.Screen name={'Search'} component={SearchScreen} />
          <DrawerStack.Screen name={'MyOrders'} component={MyOrderScreen} />
        </DrawerStack.Navigator>
      </NavigationContainer>
    </SafeAreaView>
  );
};
Here’s how I’ve defined the SearchScreen and MyOrderScreen components.
These components could have been stack navigation components as well. I am returning the regular React Native component for the sake of simplicity.
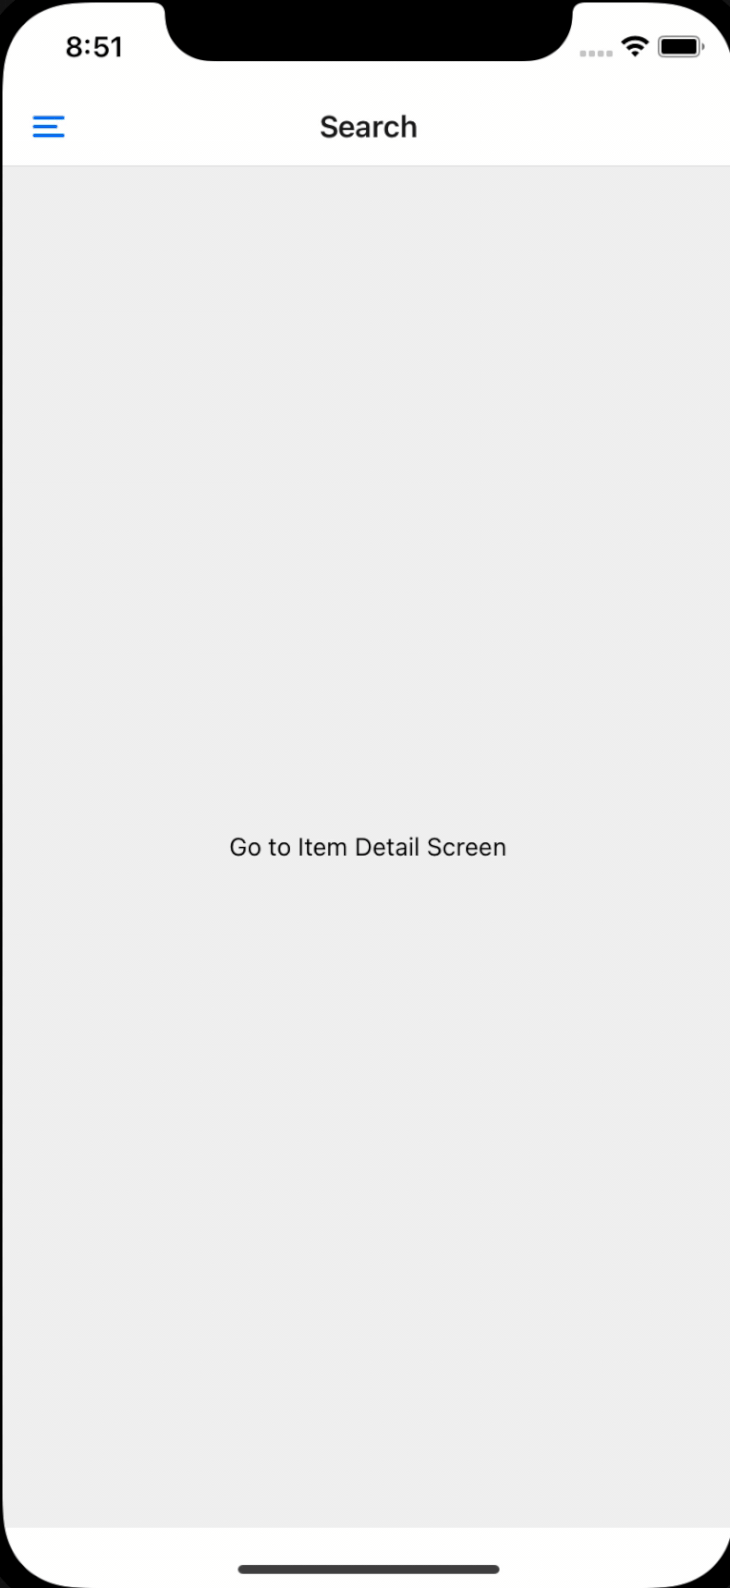
const SearchScreen = ({navigation, route}) => {
  return (
    <SafeAreaView style={styles.fullScreen}>
        <Text>This is the Search Screen</Text>
    </SafeAreaView>
  );
};
const MyOrderScreen = ({navigation, route}) => {
  return (
    <SafeAreaView style={styles.fullScreen}>
      <Text>This is the my orders screen</Text>
    </SafeAreaView>
  );
};
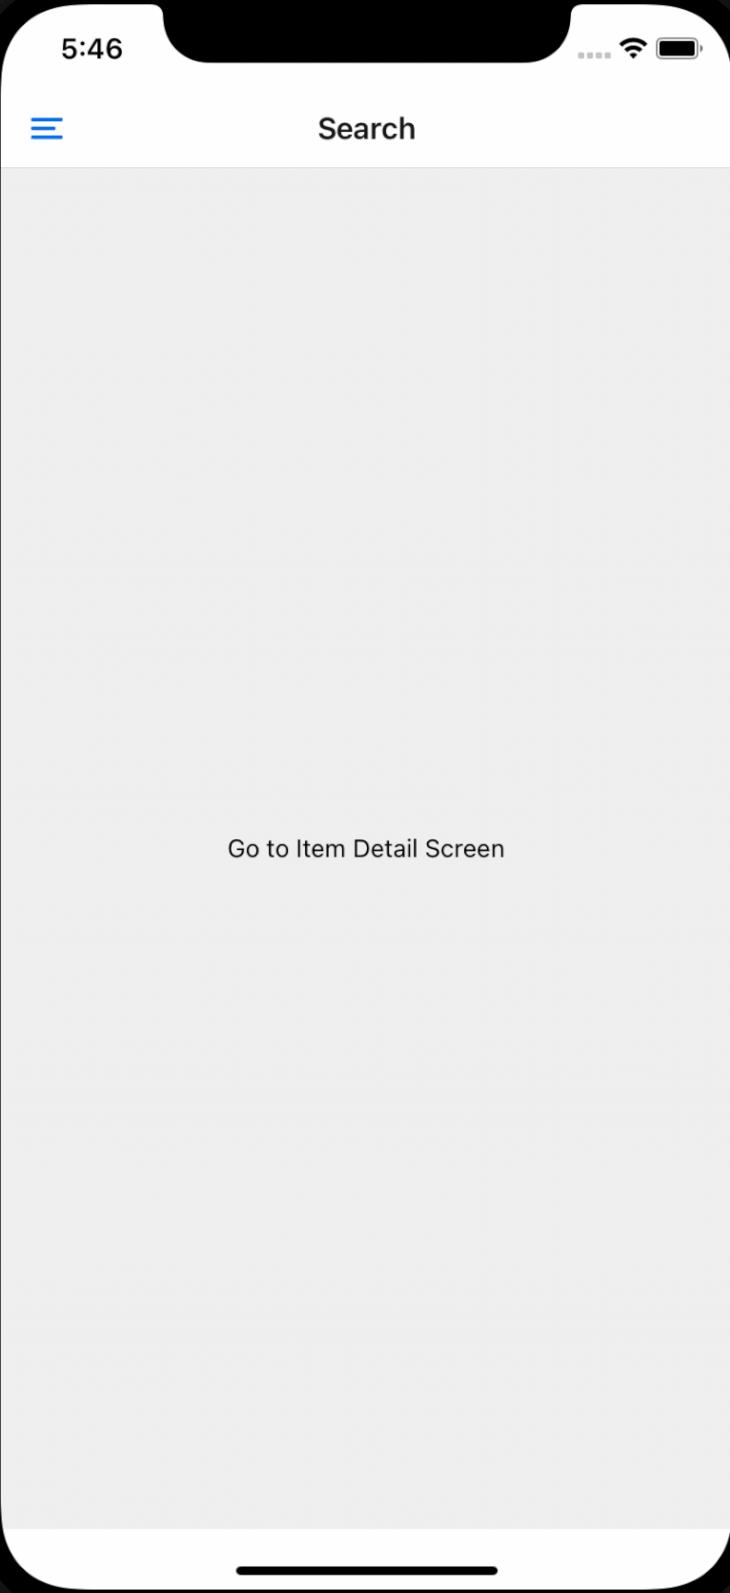
Once you run the app, you should be able to see the hamburger icon on
the top left of your screen. This is how you will access your drawer
menu. You can navigate to the screens that you have declared as part of
your drawer navigation (in our case, the SearchScreen and MyOrderScreen).
Opening and closing the drawer
In the above section, we saw that just wrapping the entire stack inside the DrawerStack gives you a hamburger icon that opens the drawer upon clicking it.
But what if you want it to also appear on a button tap or any other action from within your screen? Or, what if you want to create a custom navigation stack header where you add your own custom icon to open the drawer?
You can do so using the openDrawer and closeDrawer APIs on the navigation object, which is passed into every screen and is part of the DrawerStack.
navigation.openDrawer() // opens the drawer
navigation.closeDrawer() // closes the drawer
Customizing the drawer
Just like the previous sections, you can customize the drawer using the drawerContent prop on the DrawerStack.Navigator component.
Here’s an example of how you would use the drawerContent prop to return a custom drawer component:
const CustomDrawer = ({props, navigation}) => {
  return (
    <View
      style={{
        justifyContent: 'center',
        alignItems: 'center',
        flex: 1,
      }}>
      <Text>This is a custom drawer</Text>
    </View>
  );
};
export const App = () => {
  return (
    <SafeAreaView style={{flex: 1, backgroundColor: 'white'}}>
      <NavigationContainer>
        <DrawerStack.Navigator
          initialRouteName={'Search'}
          drawerContent={({navigation}) => {
            const customProps = {}; // You can pass in any custom props here in case you have to
            return <CustomDrawer props={customProps} navigation={navigation} />;
          }}>
          <DrawerStack.Screen name={'Search'} component={SearchScreen} />
          <DrawerStack.Screen name={'MyOrders'} component={MyOrderScreen} />
        </DrawerStack.Navigator>
      </NavigationContainer>
    </SafeAreaView>
  );
};
Given that you can also pass the navigation object to your custom drawer component, you can use that to navigate between screens as well.
Overriding custom styles of the default drawer
If you do not want to create a custom drawer component from scratch, you can use the screenOptions prop on the DrawerStack.Navigator to override some basic styles and components of the drawer component that are provided by the library.
Some common keys that you can use are:
drawerActiveTintColor: specifies the color of the active item in the drawerdrawerInactiveTintColor: specifies the color of the inactive items in the drawerdrawerStyle: overrides the style of the entire default drawer componentdrawerLabelStyle: overrides the text styling of the items in the drawer
Here’s an example of how to use it:
<DrawerStack.Navigator
    initialRouteName={'Search'}
    screenOptions={{
      drawerStyle: {backgroundColor: 'white'},
      drawerActiveTintColor: 'black',
      drawerInactiveTintColor: 'gray',
    }}>
      <DrawerStack.Screen name={'Search'} component={SearchScreen} />
      <DrawerStack.Screen name={'MyOrders'} component={MyOrderScreen} />
</DrawerStack.Navigator>
Conclusion
In this article, we covered the three most common forms of navigation within most React Native apps using the React Navigation library. React Navigation provides us with simple APIs that incorporate these flows into your application.


No comments:
Post a Comment